That quickly captures my dilemma. It is overwhelming to try to go back to explain the entire system so that a reader might understand where all of the problems in the old system came from. The newer reader, or the more motivated faithful, can scroll back to earlier entries to get a full understanding, but as my inspiration Inigo indicates, I will sum up.
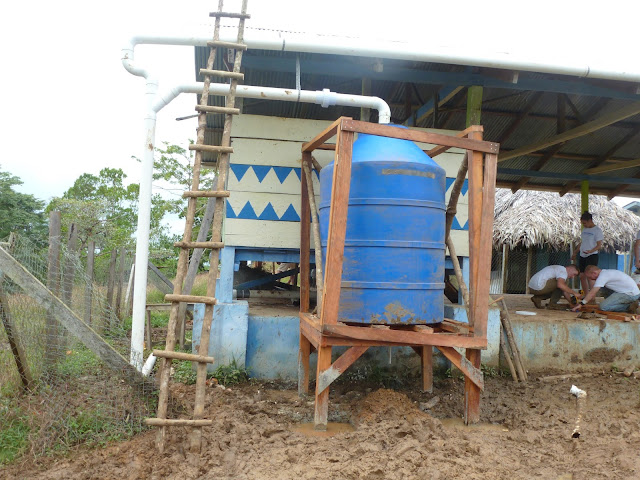
The first basic component of the system as a pair of rain gutters made of 4" PVC piping cut clamshell style and held to the two sides of a corrugated sheet metal roof with galvanized metal strapping. The roof is on a municipal pavilion know as "El Rancho" and each gutter runs about 70' long. Rainwater runs off the roof and is caught by the gutters and is used as a source of drinking water for the community. This is where the first two of our problems came up: First, on the east side of the roof (incidentally, the lagoon side) three of the six straps securing the gutter to the roof must have rusted out and sections of the PVC piping had pulled away from the sheet metal creating a gap between the edge of the roof and the gutter. The second problem is that on both sides of the roof several of the PVC joints and one end cap must have separated (PVC cement failure?) and were leaking profusely. Sounds simple, but these repairs alone proved to be a complicated and daunting task. Remember though, as engineers, out task is not just to repair the broken pieces, but to try to identify the underlying causes of the failures and remedy them.
You can lose a hell of a lot of water from leaks and breaks like this.
The second place where failures in the system occurred was in the "First Flush System". Since the initial wave of rain falling on the roof washes off debris, dust, and other nasty things such as bird crap, we have added a nice amenity called a First Flush System. This is a series of 4" PVC pipes that connect to the end of the collecting gutters and drop down vertically for about 10' or so until they encounter the ground at which point the pipe makes a 90 degree turn and runs along the ground for eight more feet before terminating in a dead-end cap with a cleanout plug (see photo below). The idea is that the first volume of "dirty" water (the "First Flush" or the volume which is calculated as a rain depth of the first 1mm deep x the area of each side of the roof) is flushed down into the catchment tube, which has a volume of 14 gallons which is the amount needed based on the above calculations. Once the top of the tube fills with dirty water, the remaining water is fairly clean of sediment and then diverts horizontally by a Y elbow and now starts filling the main tank. Finally, at the bottom of the First Flush pipe is a 1/32" drill hole that allows the accumulated dirty water to gradually drain out. When we arrived we found that the entire lower ends of the pipe had settled into the mud and were overgrown with vegetation. The drain holes were completely blocked and the pipes, all the way from the end caps up to the top of the Y-pipe were filled with standing, non-drained water. I was able to establish this by tapping on the pipes and finding non-resonant pipes - common to both engineering and medicine. We would need to excavate the two ground level pipes, find and disimpact the blocked holes and possibly relocate a new set of first flush pipes.
 |
| First Flush System at installation last year - note horizontal pipe on ground at left of ladder. |
 |
| First Flush System upon return - horizontal pipe is no longer visible - completely overgrown. |
Above and beyond these major problems, there were a host of smaller things like supports on the tank platforms separating, and leaky faucets and such.
I will break for now. Next up: Our New Digs


No comments:
Post a Comment